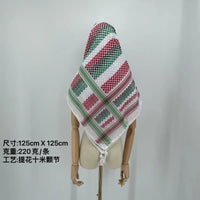
How To Tie an Arabic Scarf: Emirati Gulf Style Shemagh Tutorial
Tying a shemagh, also known as a ghutra or even an amamah in some places, is a timeless tradition in the Arab world, particularly in the Gulf. Whether you’re in the UAE or beyond, the headgear styles vary slightly depending on where you are, but today I’ll walk you through how to tie the Emirati shemagh in a Ras Al Khaimah style, a personal favorite of mine.
This method is quick and easy, and once you’ve got the hang of it, you’ll be tying your shemagh effortlessly every day!
Step 1: Start with a Basic Shemagh
You’ll need a simple white shemagh, which you can easily pick up at a Middle Eastern or Islamic store. The shemagh typically comes in a square shape, and the first thing you need to do is fold it into a triangle. Align the two edges to create a neat fold.
Step 2: Create the Base
Next, fold over the top part slightly. This fold will create a base for the shemagh to rest comfortably on your head. The amount you fold is up to you, but a hand's width is a good starting point.
This base helps the shemagh sit snugly on your head and prevents it from slipping around—especially useful if you’re not wearing a skull cap underneath.
Step 3: Position the Shemagh on Your Head
Once your shemagh is folded, it’s time to place it on your head. Line it up so that the center of the triangle is in the middle of your forehead, close to your eyebrows. If you're not wearing a cap, you’ll want to flatten your hair down to avoid it getting in the way.
Step 4: Wrap the Left Side
Now, grab the left side of the shemagh and bring it across your head. As you wrap it, you’ll want to start folding the fabric neatly. You should end up with a square fold at the front.
Once the left side is wrapped, tuck the end into the folds at the back of your head. If the top is looking a bit puffy, don’t worry. Just use your hands to smooth it down for a more contoured fit.
Step 5: Wrap the Right Side
Now for the right side. Bring it across the front of your head, following the same folding pattern. Since this is the side most people will see, take a bit more time to neaten up the folds and make sure it looks sharp.
At the back, you can either leave it loose for a more relaxed look, or fold it neatly to create a clean finish.
Step 6: Final Adjustments
To finish off, tuck the remaining ends of the shemagh into the folds. I personally like to leave one end covering my ear, while the other side is rolled up for a more casual, comfortable look. This style is especially handy when you need to talk on the phone, as it leaves one ear uncovered.
The End Result
After making a few adjustments to smooth everything out, you should have a neat and stylish Emirati-style shemagh. The folds should look clean, and the fabric should sit comfortably around your head. You can choose to let one end hang down at the back, or tuck it in for a more compact look.
Final Thoughts
This Ras Al Khaimah-style shemagh is simple yet classy, and it’s a great way to carry on the tradition while staying comfortable. Like anything, it may take a bit of practice, but once you’ve done it a few times, you’ll be able to tie your shemagh in no time.
With this tutorial, you’ll be ready to confidently wear your shemagh for any occasion—whether it’s a casual day out or a special event!


