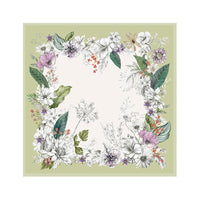
A small shift in tail length changes the whole arrangement. If you have been staring at your mirror wondering whether both pointed tips should finish at exactly the same place, or whether one should sit a little lower than the other, this is a genuine styling question worth a few quiet minutes. It is not about correcting your body or hiding anything. It is about how a shaped, tapered scarf sits against a neckline, and how much of the brushstroke print you want to see.
Here is the short answer up front. Even tails read as structured and considered. They feel a touch more formal and give the piece a symmetrical, framed presence at the front of an outfit. Slightly offset tails can give a more relaxed impression. Neither is more correct. Both are proposed arrangements you can try on the same scarf in front of the same mirror, then decide which one belongs to your morning routine.
Below is a simple two-option exercise built around the Abstract Watercolor Brushstroke Chiffon Scarf with Pointed Ends, so you can see the shape, the print direction and the neckline balance working together, rather than choosing in the abstract.

Why the Pointed Ends Matter to the Styling Choice
This scarf tapers to a point at each end. Those tapered tips create a distinct outline, so their placement is worth considering alongside the loop and the print. Straight-ended scarves can also have prominent tails; here, the particular pointed shape is the feature we are arranging.
That means two things for the mirror check. First, avoid tucking the tips inside a tight knot or folding them under, because the taper is doing part of the design work. Second, once you have chosen where each tip should fall, the rest of the loop can stay very loose. You are not trying to lock the scarf in place, only to arrange the visible outline.
The gallery for this scarf shows both a looped arrangement with tapered tips just peeking out, and a laid-flat view where the two points are clearly visible. That laid-flat view is the useful starting point when you want to plan the tail lengths before draping.
Setting Up the Mirror Before You Start
Before you loop anything, pick the outfit you actually want to style with. A simple crew or scoop-neck top is the easiest baseline because it does not compete with the scarf. A collared shirt or an open jacket with lapels changes the frame around the scarf and will affect how visible each tip is. Try one of each if you can, so you learn how the scarf behaves in both contexts.
Stand in front of a full-length or at least chest-up mirror. Lay the scarf flat once, quickly, so you can see where each pointed end sits along the length. Do not pin the scarf. Do not tie a tight neck knot. The whole exercise assumes a gentle loop with room to breathe, rather than assuming a particular fabric appearance guarantees comfort.

Option A — Balanced Ends for a Structured Look
For the even-tails arrangement, drape the scarf around your neck so the middle sits at the back and both pointed ends fall roughly in front of your shoulders. Cross one end lightly through a loose loop, or simply let the fabric hang in a soft U shape without any knot at all.
Now adjust the two tips so they finish at the same visual line — for example, both meeting the top of your sternum, or both grazing a jacket button line. Do not measure. Just eyeball them in the mirror.
A few notes for this option:
- Only attempt fully even tails if the scarf has enough length on you to reach a comfortable matching point. If matching them requires tension, release the loop and use an open drape instead. Changing tail lengths should never require tightening around your neck.
- Let the tapered points hang free. Do not fold, chop or tuck the tips to make the ends match.
- Check the print direction. The brushstroke lines on this scarf run in a clear vertical direction in the gallery, so an even arrangement tends to emphasise that verticality down your front.
This option pairs well with a simple neckline, and with any outfit where you want the scarf to look intentional rather than thrown on.
Option B — Modestly Offset Tails for a Relaxed Drape
For offset tails, start the same way — scarf around the neck, soft loop, no tight knot — but deliberately begin with one side longer than the other. Drape the longer tail down to one side of the front. The shorter tail can sit higher, framing the collarbone, while the lower tail continues the brushstroke line further down the body.
The offset should be modest. You are not aiming for a dramatic one-shoulder swag; you are letting one tip finish a little lower than the other so the arrangement feels casual. Think of it as the difference between a shirt tucked in all the way around and one tucked in a little more relaxed at the front — the same garment, a different mood.
For a weekday jacket, try letting one tip peek out beside a lapel while the other sits closer to the centre. Check that neither end catches on buttons or feels trapped under the jacket.

Comparing the Two on the Same Neckline
Once you have tried both, look at three things in the mirror:
- Print visibility. Which version lets more of the watercolour brushstroke show? The result depends on where the loop lands: compare the sections of print visible in each arrangement.
- Knot bulk. Is there a lump of fabric under your chin? If so, loosen the loop. A pointed-end scarf looks best when the knot area stays soft, not compressed.
- Neckline balance. Do the tips land at flattering points on your top or jacket, or do they cut across a busy design element? Adjust the tail lengths, not the top.
Trying It With a Jacket Versus a Simple Top
Under a jacket with lapels, the offset arrangement tends to feel most natural when one end sits beside a lapel. Try it without assuming the jacket needs an asymmetric arrangement; even tails can work too.
Over a plain crew-neck top with no jacket, even tails often look more polished because there is nothing else framing the front of your body. The scarf becomes the frame.
Neither is a rule. It is only a starting point for your own comparison.

Blue-Grey Versus Green: Using the Pictured Palettes
The gallery shows the scarf in a blue-grey, cream and ochre brushstroke palette, and in a green, cream, blue and ochre version. Both are looped and laid flat in the images so you can see the shape and the print together.
The blue-grey palette leans cooler and quieter, and tends to sit calmly against navy, denim, charcoal and soft neutrals. The green version brings in warmer contrast through the ochre and cream and can lift a beige, olive or cream outfit. These are palette preferences to consider, not colour-matching guarantees — your own wardrobe will do the deciding.
A Quick Movement Check Before You Leave the House
Walk a few steps. Turn your head. Reach for something. If the loop tugs, loosen it. If a pointed tip catches on a button, reposition it. If the scarf feels uncomfortable at any point, take it off and re-drape rather than tightening the knot.
For an accurate sense of length on your frame, ask the seller to confirm the current measurement of the exact scarf you are considering, or measure a sample yourself before committing to a larger order.
You can view the scarf here: Abstract Watercolour Brushstroke Chiffon Scarf with Pointed Ends. For sizing questions or wholesale enquiries, contact the team.
FAQs
Are the pointed ends a design feature or a cut error? They are the shape of the scarf. Both ends taper to a point rather than finishing in a straight hem, which is why the tail placement becomes part of the styling.
How long is this scarf? The listing contains differing measurements, so this guide does not use a fixed length. Ask for a labelled measurement of the current piece before planning a particular loop or tail position.
Is this scarf silk? No. It is listed as polyester, described as a chiffon-style scarf with a sheer-looking finish.
Should I always match the two ends exactly? No. Even tails read as more structured; a modest offset reads as more relaxed. Try both in the mirror and choose the arrangement that suits your outfit and the day.